


.svg)
How to launch a new website
Whether you’re doing it for the first or the 20th time, launching a website is challenging. It involves various steps - from choosing the right domain name and web hosting provider to designing the site and optimising it for search engines.
This checklist is designed to guide you through the entire process in an easy-to-understand way. Whether you're a beginner, an expert, or somewhere in between, this guide will provide you with the necessary steps to successfully launch your website. Let's get started!
PS - You can also download our free checklist to follow here!
Pre-launch
Purchase domain name
Your domain name impacts how people find you online and how they perceive you. Essentially, a domain name functions as your digital address - it's the specific string of text and sometimes numbers, that users input into a browser to navigate directly to your website, as demonstrated in the graphic below.
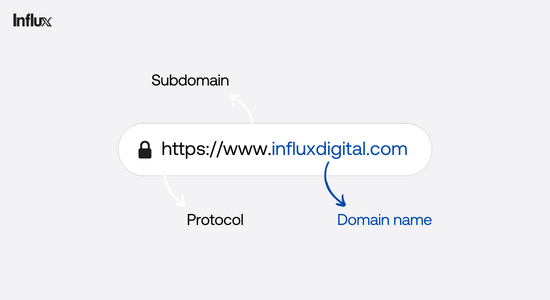
Fun fact (kind of) www is the most common subdomain in the world and stands for World Wide Web, but you already knew that 😉
How to buy a domain name
Follow these steps:
- Select a reliable domain registrar that is accredited with the Internet Corporation for Assigned Names and Numbers (ICANN).
- Use a domain availability checker tool to see if your desired domain name is available.
- If your preferred domain names are taken, you can keep searching, choose another extension, or reach out to the current owner with an offer.
- Purchase and register your chosen domain name. You'll need to provide your contact information during checkout.
Moving from an existing website
Review your current, soon-to-be, old site
When you're moving from your old website to your new one, it's important to look at your existing site closely. This step can sometimes be missed but is key for a smooth move and keeping your SEO standings.
In planning your website move, find the pages that are getting the most valuable traffic. These pages are a big part of your online activity, bringing in visitors, leads, and sales. They should be given priority and handled with care during the move.
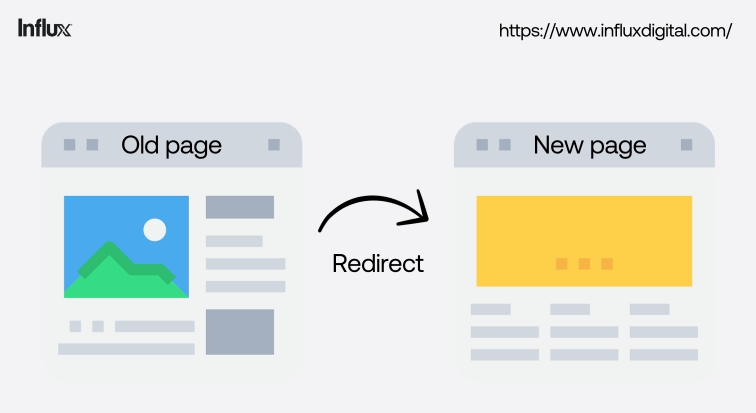
If these pages are important for your business, you should guide this visitor traffic to a similar page on your new website. A good way to do this is to use the same URL structure. This keeps things easy for users and search engines, preserving the user experience and your SEO standing. By using the same URLs, no more steps will be needed, making the move quick and easy.
There may be times when you don't have a new page to replace with the ones from your old site. In these cases, you should try to guide the old URL to the closest related page on your new site. While this might not be an exact match, it will help save some of the SEO value depending on how close the topic is and how good the landing page and content are.
If there's no good replacement page, you could think about guiding to the homepage. But be careful, this should be used only as a last option. Guiding all traffic to the homepage can confuse your visitors and hurt your organic traffic. Each redirect should help the visitor and match their original intent as much as possible.
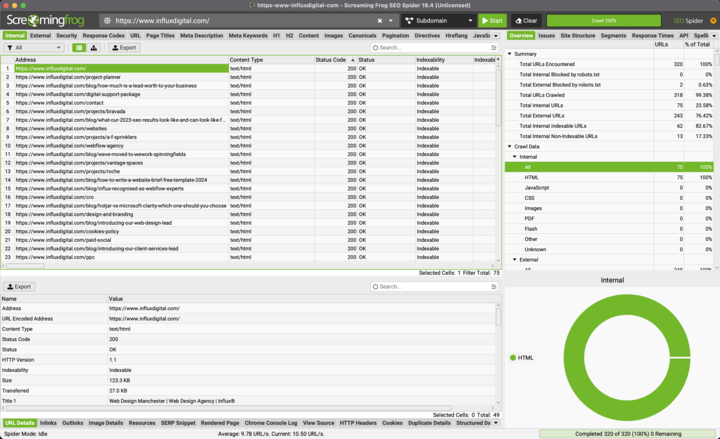
Crawl old/current site
Performing a site crawl before initiating your migration is essential as it will help you identify your top-performing pages, therefore you can ensure these pages are preserved.
Search for URLs, metadata, page titles, content, redirects and broken links. This will offer you valuable insights about your current website, enabling you to identify any issues that need to be rectified during the site migration.
Screaming Frog is an excellent tool for this purpose. It's a user-friendly crawler, ideally suited for small to medium-sized websites.
How to migrate your existing website
Site migration involves implementing significant changes to a website. This could range from altering the site's URL structure to relocating it to a fresh domain. The process involves changes to the website's UX, structure, design, and content.
To perform a website migration, follow these steps:
- Plan and prepare: Start by thoroughly analysing your current website and identifying the reasons for migration. Create a detailed plan that outlines the objectives, timeline, and potential risks. Make sure to backup all existing website files and databases to avoid data loss.
- Set up the new environment: If you're migrating to a new server or domain, set up the necessary infrastructure. Install the required software, configure the server settings, and ensure that the new environment meets the technical requirements of your website.
- Content migration: Transfer all website content to the new test site or staging site. This includes pages, blog posts, images, videos, and other media files. Maintain the same structure and hierarchy as much as possible IF you want to minimise disruptions for users and search engines. This isn’t always possible or desired.
- URL redirects: Implement proper URL redirects from the old website to the corresponding pages on the new website. This ensures that visitors who access old URLs are automatically redirected to the relevant content on the new website. This step is crucial for preserving SEO rankings and preventing broken links.
- Test thoroughly: Before making the new website live, thoroughly test all functionalities, forms, navigation, and compatibility across different devices and browsers. Identify and fix any issues or errors that may arise during testing. Between initial development and content migration, there will likely be differences or additions made and potential bugs that need to be fixed.
- Update DNS and Go live: Once you've completed testing and made necessary adjustments, update the DNS settings to point the domain name to the new website. This will make the new website accessible to visitors. Monitor the website closely after going live to address any further issues that may arise.
- Monitor and optimise: After the migration, monitor the website's performance, user feedback, and SEO rankings. Make any necessary optimisations to improve speed, usability, and search engine visibility.
Note best-performing pages (SEO - Analytics - Search console)
Once you have conducted your site crawl, identify the pages with -
- The highest conversion rate
- The most referring domains
- The most organic traffic
- That drives the highest amount of revenue
If you are required to conduct 301 redirects, you should ensure that these pages are preserved to protect their SEO value to your site.
This moves us nicely onto SEO...
Content SEO
Keyword Research
When it comes to creating a successful website for your business, one of the most important steps is researching the best keywords. Keywords determine how potential customers find your website online. By selecting the right keywords, you can increase your website’s visibility and attract more traffic. But how do you find the best keywords for your website or business? It’s all about understanding your audience and what they’re searching for online. Take the time to research keywords related to your industry and services, and use them strategically throughout your website’s content. We recommend any of these tools for conducting your research -
- Ahrefs - https://ahrefs.com/keywords-explorer
- Semrush - https://www.semrush.com/
- Moz keyword planner - https://moz.com/explorer
Competitor Analysis
By analysing competitors' websites and content using SEO tools, you can gather information about what works for competitors. These tools reveal keywords that competitors are ranking for and their estimated traffic which you can use to recreate for yourself and improve upon.
Gap Analysis
A keyword gap analysis is a technique used in Search Engine Optimisation (SEO) to uncover opportunities for improving a website's ranking. Once you have launched your website you should consider finding keywords that are not being utilised on your website, or keywords with low competition but high relevance to your specific niche. This may require new content or a completely new section on your website for example industry specific pages or new service pages.
Choose one main target keyword per page
Google's mission is to help users in finding the correct information they are looking for when conducting a search. They are more likely to display pages with a specific focus or high relevance to the search query, rather than pages attempting to rank for several different topics at once.
We recommend choosing one main target keyword and enough secondary keywords to cover a given topic in full per page. Using the keyword research you have conducted you should be able to choose one primary keyword to use.
Make sure best performing pages have somewhere logical to go
Before you go live with your new website, you should review what pages currently perform well on your website in terms of SEO rankings and organic traffic. If the best-performing pages are still relevant for your new website then you should consider keeping them but improving them. This may include updating the copy to add more relevant keywords or updating/optimising images to be high quality. If possible, you should keep the URLs of these pages the same to avoid 301 redirects.
If these pages are no longer relevant, you should use a 301 redirect to the most relevant page closest to them, or if they are completely irrelevant then redirect to the homepage (however try to use this as a last possible resort).
Metadata
Website metadata includes page titles, descriptions, keywords, and more, used by search engines to interpret data and information that determines the relevance of a page in comparison to a user’s search.
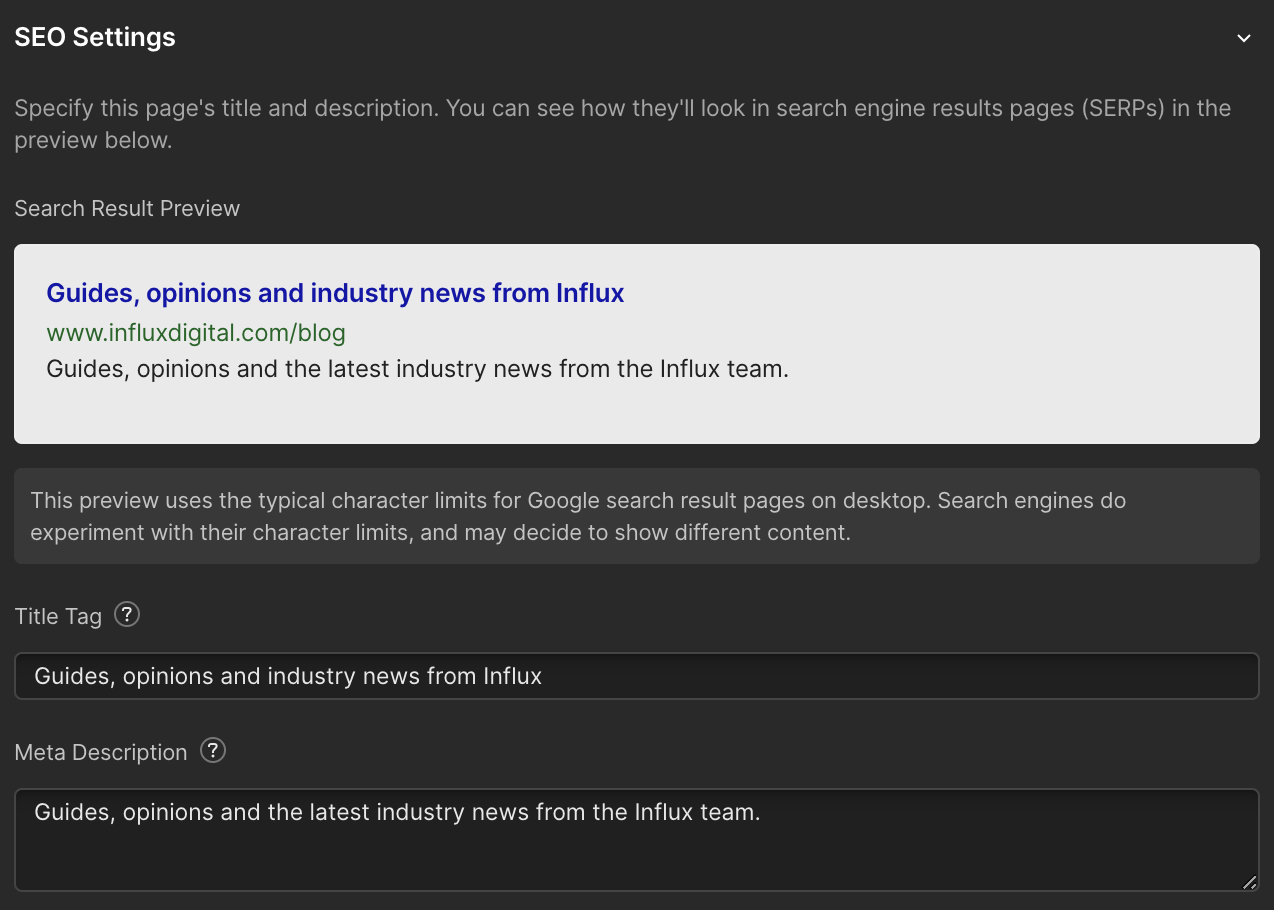
If you use a content management system (CMS) like Wix or WordPress, you may have the option to directly edit your Metadata, or your CMS might provide a search engine settings page or another method to communicate metadata information to search engines.
If you are using WordPress, you can edit your Metadata using the Yoast plugin which offers built-in support for description and keyword meta tags.
If you are using Webflow, see this useful guide.
Page titles
Page Titles, also known as "Title Tags", are small segments of HTML code located within the source code of web pages. You should aim to make these around 60 characters long to avoid being cut in search results.
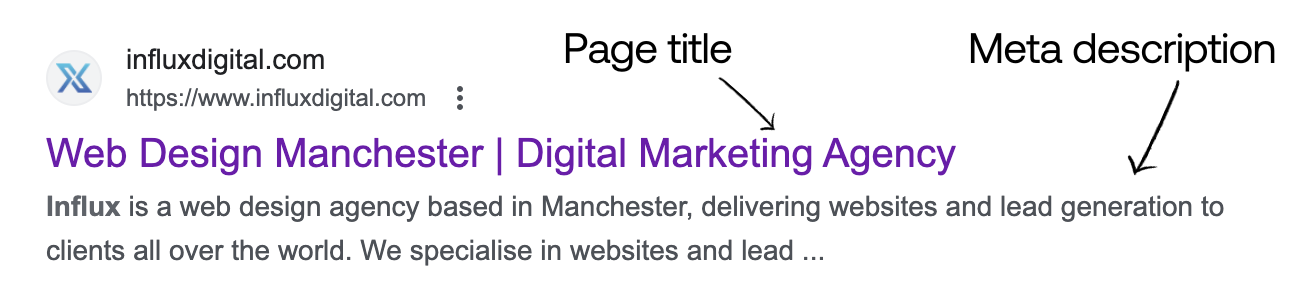
Meta descriptions
Meta descriptions are unique summaries of a webpage's content used by search engines. They should be distinct for each page and included in the 'head' section of every webpage. Most website builders will have somewhere to easily update this in the page settings:
SEO in Webflow
SEO in WordPress
Why is this important?
Even though meta descriptions don’t directly affect SEO rankings, they do affect click-through rates, which in turn affect SEO rankings.
Here are some tips on how to optimise meta descriptions for better SEO:
- Use relevant keywords: Include important keywords in your meta description.
- Make it compelling: Your meta description should not only contain keywords but also be interesting.
- Unique for each page: Each page on your website should have a unique meta description. This helps search engines understand the content of each page, and it also prevents duplicate content issues.
- Keep it concise: Meta descriptions should be between 150 and 160 characters long. Any longer and they may be cut off in search engine results.
- Monitor and adjust: Use tools like Google Search Console to monitor the click-through rates of your pages. If a page has a low click-through rate, you may need to improve its meta description.
- Don't leave it blank: If you don't provide a meta description, search engines will try to create one for you based on the content of your page. This can result in less-than-optimal descriptions, so it's best to write your own.
Title tags
Title tags are HTML elements that define the title of a web document. They appear on search engine results pages (SERPs) providing previews for specific pages. These tags are vital for both search engine optimisation (SEO) and social media sharing. Ensure to make your title tags relevant, keep them short, use relevant keywords and try to include your brand name.
How to add title tags and meta descriptions
Thankfully writing HTML tags for page titles and meta descriptions is a straightforward process. You can use the notes program on your computer's desktop to write them. However, the installation process can be complex, depending on the website's underlying system.
Adding metadata varies across different Content Management Systems (CMS). For instance, WordPress requires the installation of a plugin to simplify the addition of page titles and meta descriptions. On the other hand, Shopify offers built-in options that make it easy to add metadata to each product page.
Schema markup
Schema markup enables Google to interpret the content of your web pages better, which can improve the rankings of your pages for relevant traffic. Many websites do not use schema markup, so doing so before you launch can get you ahead of competitors.
Schema markup can be conveyed to Google through three primary coding formats, which ensure that your schema markup code is interpretable. These formats are:
- JSON-LD
- Microdata
- RDFa
Thankfully you do not need to have coding skills in order to create schema codes, as there are tools that can create them for you. We recommend using Google’s Structured Data Markup Helper to Implement Schema Markup on Your Website, and Google’s Rich Results Test tool to test your schema markup.
Testing
Test all of Your Forms, Links, and Widgets. As you and your team navigate through the site, make sure to click on all the links, verify all form inputs, and check the functionality of any scheduling/booking widgets. Remember we offer free bug fixing for a month after your site goes live!
Another important piece of advice for anybody who has just got their new website live – test your contact forms. You may love the design of your super slick new contact forms, but you want to be absolutely sure messages will come through to you. There are various reasons why a contact form may need adjusting, from test email addresses being left in the system to minor configuration adjustments required on your website’s backend or server. You may also need to ensure that you have whitelisted the address that any submitted forms are sent from.
If your contact form includes an automatic reply, be sure to check how this looks in your email inbox too, to make sure that there is no test text or Lorem Ipsum (Latin filler text) that has been overlooked.
In most cases, you’ll have no problem looking after this step but don’t hesitate to speak to your developer if you have any questions – getting the customer relationship right from the outset is crucial to business success.
User Experience
Before the launch of your new website, you should double-check your designs to ensure you haven’t missed any small mistakes, some are easily missed so it’s best to share the responsibility across your team for some extra pairs of eyes!
Areas to check include:
- Images - Make sure they’re not blurry, all the right way up, nothing cropped out that shouldn’t be
When uploading graphics, it's recommended to do so at double the size they'll appear on your website. If you're using a platform capable of optimising images, like Webflow, it allows you to both resize and compress images for devices with lower resolution while keeping larger files intact for high-resolution devices. This strategy guarantees high-quality visuals, yet still provides support for devices with slower processing capabilities or internet speeds.
- Typography - Your fonts are consistent across your site
- Your logo - Ensure it appears sharp in all formats, especially if it has been enlarged.
- Spelling and grammar
Remember to check how these appear across different types of devices such as desktop and mobile!
Test on different devices
We recommend that you fully test your device across all devices and browsers. A fully responsive website will be designed to adapt to suit different display sizes to offer the best possible user experience, so how your site looks will vary between a mobile phone, tablet and laptop or desktop computer. Take the time to go through your site on each of these devices to make sure everything looks in order. If you find anything that does not appear to be correct, make a note of the URL, device and browser and inform your developer or designer.
As well as devices, it is important to remember that your website may appear differently on different browsers such as Google Chrome, Microsoft Edge / Internet Explorer, Firefox or Safari. Have a thorough browse through your site on as many different browsers as you can to ensure that everything is in order.
A professional web design and development agency will usually have an extensive testing process in place to help ensure that any issues are eliminated well before launch, but it is always a good idea to conduct final checks with fresh eyes.
Test Links
Internal and external links are essential not just for your visitors, but also for your SEO. As well as giving a poor user experience, broken links may cause customers to leave your website.
Although you could manually check every link, this would be a time-consuming task and there would still be a risk of missing the odd one, therefore it is better to use a tool to check. There are several good SEO software solutions that will check for broken links on your website, and a great tool to use for this is one called Screaming Frog, whose broken link checker is free to use for up to 500 URLs.
Some examples of links to test include:
- Links from logos
- Top navigation links
- Footer links
- Links to social media profiles
Proofread / Check Spelling & Grammar
Ensure to proofread all of your content before publishing it to your website. We recommend these tools:
1) Grammarly - To check grammatical and spelling errors across your written content
2) Hemingway Editor - To check content readability
Errors can come across as unprofessional and may diminish trust, causing users to spend less time on your website or exit entirely. This can affect your SEO rankings, so be sure to ask a second pair of eyes to have a look over before publishing.
Technical SEO
Site speed
Since relatively recent updates to the way Google determines its page rankings, the speed at which your website loads is now a key component of your overall search engine performance. There are many different tools available online to help you measure how fast your website loads – so many that it can be hard to decide which ones can provide meaningful and actionable results.
Google PageSpeed Insights is a free tool that allows you to quickly and easily test the speed of a web page. Submitting a URL and hitting “Analyse” will quickly generate a detailed report of what might be slowing down a given web page based on two parameters, along with recommendations on potential solutions.
Parameter 1 – Time to above-the-fold load: How long it takes for a page to display content above the fold after a user requests a new page.
Parameter 2 – Time to full page load. How long it takes a browser to fully render a page after a user requests it.
The tool is described by Google as follows:
“Page Speed Insights measures the performance of a page for mobile devices and desktop devices. It fetches the URL twice, once with a mobile user agent, and once with a desktop-user agent. The PageSpeed Score ranges from 0 to 100 points. A higher score is better and a score of 85 or above indicates that the page is performing well.”
Color-coded results make it easy for you to see which issues should be addressed as a priority. However, there are some key points to bear in mind. In particular, not all of the suggested solutions that Google offers will apply to your site. Some may indeed be quick fixes requiring a minimum of effort, while others may be more complex and require a developer to implement. Some of them may be simply irrelevant to your site. Ultimately, fine-tuning your site to maximise the page speed rank can be a complex job that will often be best achieved in partnership with an experienced developer who has specialist knowledge of the platform upon which your website is built and the server environment.

Image optimisation
The Images and graphics you choose to feature on your website are very important. Using high-quality photographs and engaging graphics can enhance the user experience and boost SEO.
When uploading graphics, it's recommended to do so at double the size they'll appear on your website. If you're using a platform capable of optimising images, like Webflow, it allows you to both resize and compress images for devices with lower resolution while keeping larger files intact for high-resolution devices. This guarantees high-quality visuals, yet still provides support for devices with slower processing capabilities or internet speeds.
SSL Certificates (HTTPS)
During the process of building your new site, you have most likely heard of SSL certificates. But what are they, and why are they important?
When a website is SSL-protected, the URL begins with "https://" as opposed to "http://", and a padlock symbol is visible in the browser's address bar. These indications assure visitors that their information is safeguarded and is essential for protecting your website users’ data and building trust.
Here's a brief guide on how to install SSL certificates:
- Choose a Certificate Authority (CA): Select a reputable CA that offers SSL certificates. Some popular choices include Let's Encrypt, Comodo, and DigiCert.
- Follow your web hosting provider's instructions to install the certificate. This typically involves accessing your hosting control panel, locating the SSL/TLS settings, and uploading the certificate files.
- Configure your website: After installing the certificate, configure your website to use HTTPS. Update all internal links to use the "https://" protocol, and redirect HTTP traffic to HTTPS
- Test and renew: Ensure that your SSL certificate is working correctly by visiting your website using the HTTPS protocol. Remember to renew your SSL certificate before it expires to maintain uninterrupted security for your website.
These exact steps may vary depending on your web hosting provider and the control panel you're using. We recommend seeking assistance from your hosting provider’s support team for specific instructions tailored to your setup.
Robots.txt
A robots.txt file plays a large role in the (SEO) of a website. It serves as a guide for search engine crawlers, informing them which pages to crawl and which ones to avoid. This is especially important for websites with multiple pages or sections that do not need to be indexed by search engines.
Using a robots.txt file, website owners can prevent unnecessary pages from being indexed to improve the overall SEO of their site. It can also help prevent duplicate content issues, which can negatively impact a website's ranking on search engine results pages.

Other things to consider
Choosing where to host your website
Choosing where to host your website is a decision that can impact your site's performance, security, and scalability. When deciding on a hosting provider, you should consider factors such as the provider's uptime guarantee, security measures, customer support, and the flexibility to expand as your website grows.
Platforms such as Webflow and Shopify are hosted directly on the platform, and WordPress is self-hosted.
CMS updates and maintenance
Some CMS require regular updates to keep up with new security threats, improve performance, and more. We recommend that you dedicate some time each month to checking for updates and installing them on your site. For example, if you have a WordPress site this may require updating your WordPress to the newest version, you can do this through the WordPress dashboard. However, always ensure you back your site up before doing so!
WordPress, Magento and Drupal all require regular updates therefore it is important to check with your server for what is required. Webflow however, does not require updates.
Accessibility
Currently, many sites and tools are developed with accessibility barriers that make them difficult or impossible for some people with disabilities to use. It is most efficient and effective to incorporate accessibility from the very beginning of projects, so you don’t need to go back and re-do work.
To ensure your website is accessible, you should:
- Provide textual substitutes for content that is visual
- Maintain a consistent hierarchy of text
- Utilise effective colour schemes
- Avoid using just colour as a means of communicating information
- Allow for navigation via keyboard and visible indicators
- Label form fields in a clear manner
Pause Google Ads / Ads in general
You should pause your ads whilst you are moving to your new site. This is because you certainly do not want your ads to be directing traffic to your old website. With Google ads, you are able to pause and resume your ads for any period of time. When doing so, there will not be any charges to your ads whilst they are not running.
To pause or resume your Google ads, follow these simple steps:
- Log into your Google Ads account.
- Click on the Campaigns icon.
- From the section menu, select the Campaigns drop-down.
- Click on Ads.
- Mark the boxes next to the ads you wish to pause or resume.
Cookie management and privacy policy
What the law says:
“Under EU-wide legislation, all websites that are owned within the EU or are aimed at customers in the EU are required to comply with the Cookie Law. This is a piece of privacy legislation that requires websites to get consent from visitors to store or retrieve any information on a computer, smartphone or tablet. The intention of the law was to help protect online privacy by making consumers aware of how information about them is collected and used online, and giving them a choice to allow it or not.
Cookies were first regulated under an EU Directive that was adopted by all EU countries in May 2011. The directive gave individuals the right to refuse the use of cookies that reduce their online privacy. Since that time, each country has updated its own laws to comply. In the UK this meant an update to the Privacy and Electronic Communications Regulations (PECR), which sit alongside the Data Protection Act and the GDPR to give people specific privacy rights in relation to electronic communications.”
See our blog for more details on cookies
Terms and conditions
Every business with an online presence must adhere to the Electronic Commerce Regulations. These regulations necessitate the provision of specific information to users, encompassing comprehensive details about the company and a declaration elucidating consumer rights in the context of their engagement with your business. Typically, this crucial information is most suitably positioned on the website's terms and conditions page. This not only ensures legal compliance but also underscores our commitment to transparency and customer satisfaction, reinforcing the trust our clients place in us at Influx, your Manchester-based web design experts.
You should:
Set up a clear and easy-to-access terms and conditions page that includes the following minimum requirements:
- Explanation of the technical steps involved in placing an order.
- State the terms and conditions under which a contract is made, including the applicable jurisdiction. This information must be available to the consumer in a way that can be reproduced and stored.
- Provide the name of the service provider, its email address (a contact form is not sufficient) and a geographic address.
- Provide acknowledgment of orders by electronic means and information on how to amend input errors made during the order process.
- If it is a company, provide the company’s registration number and place of registration.
- Provide membership details, including the registration number of any trade or professional association of which the service provider is a member.
As a rule, the best place to provide the majority of this information is on a clear and easily accessed Terms & Conditions page.
Backup current/old site
If you’ve been busy working on a shiny new website to replace an existing one, you might have thought that switching over to the new one was a straightforward process of simply matching up the domain to the new site. Don’t stress – the switchover is indeed a fairly simple matter that your developer will usually take care of. There is, however, an extremely important aspect that you should be careful not to overlook – redirects from your old site.
Unless your new site is a complete mirror image of your old one (which is quite unlikely), a lot of your URLs will inevitably be different. To preserve your SEO and Google rankings as best you can and also to ensure that visitors and search engine indexes aren’t suddenly bombarded with error messages for missing pages, you will need to do some behind-the-scenes work. If you do this correctly, you will ensure that your new website starts from the best possible position, giving you a powerful base to build upon.
You will need to create ‘301 redirects’, either from your old domain to your new domain or within your current domain name if it stays the same. When visitors try to visit an old page that has perhaps been indexed with Google SERPs, instead of the page not existing and your organic traffic for that page vanishing, there will be a redirect in place to automatically direct visitors to the new page. As well as avoiding the ‘404 page not found’ experience, which can impact conversions, it will also help Google to understand where to transfer any SEO value from and to (if there is any to do so). This can also help to preserve any domain authority you may have built up.
Unless this is something you have done before, we would advise you to seek help from an experienced web developer or SEO expert.
Create a cool 404 page
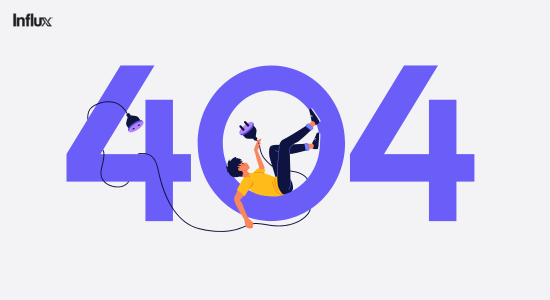
Often overlooked, in the event someone lands on a 404 page, it can help people stay on-site rather than simply leaving never to return again
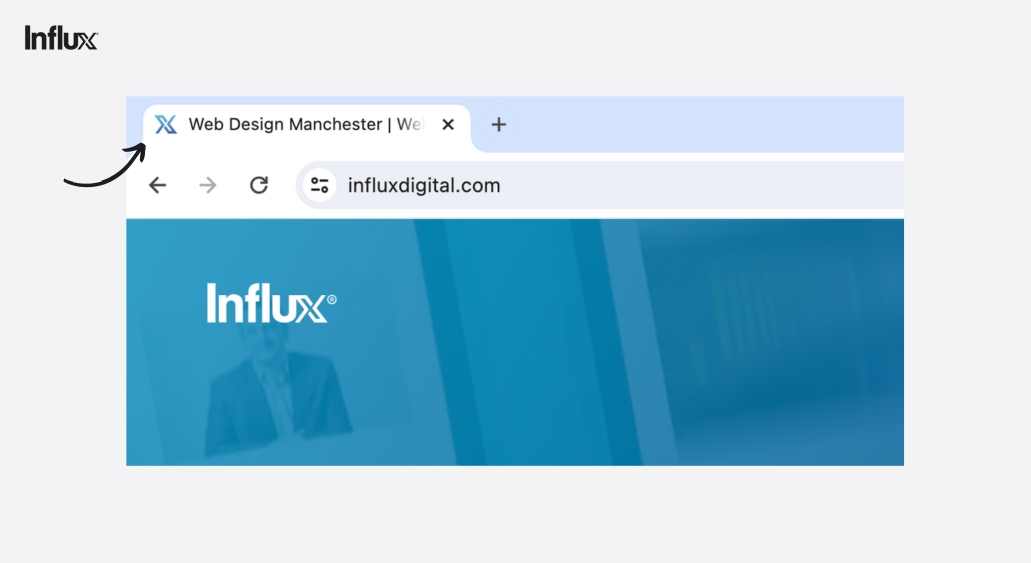
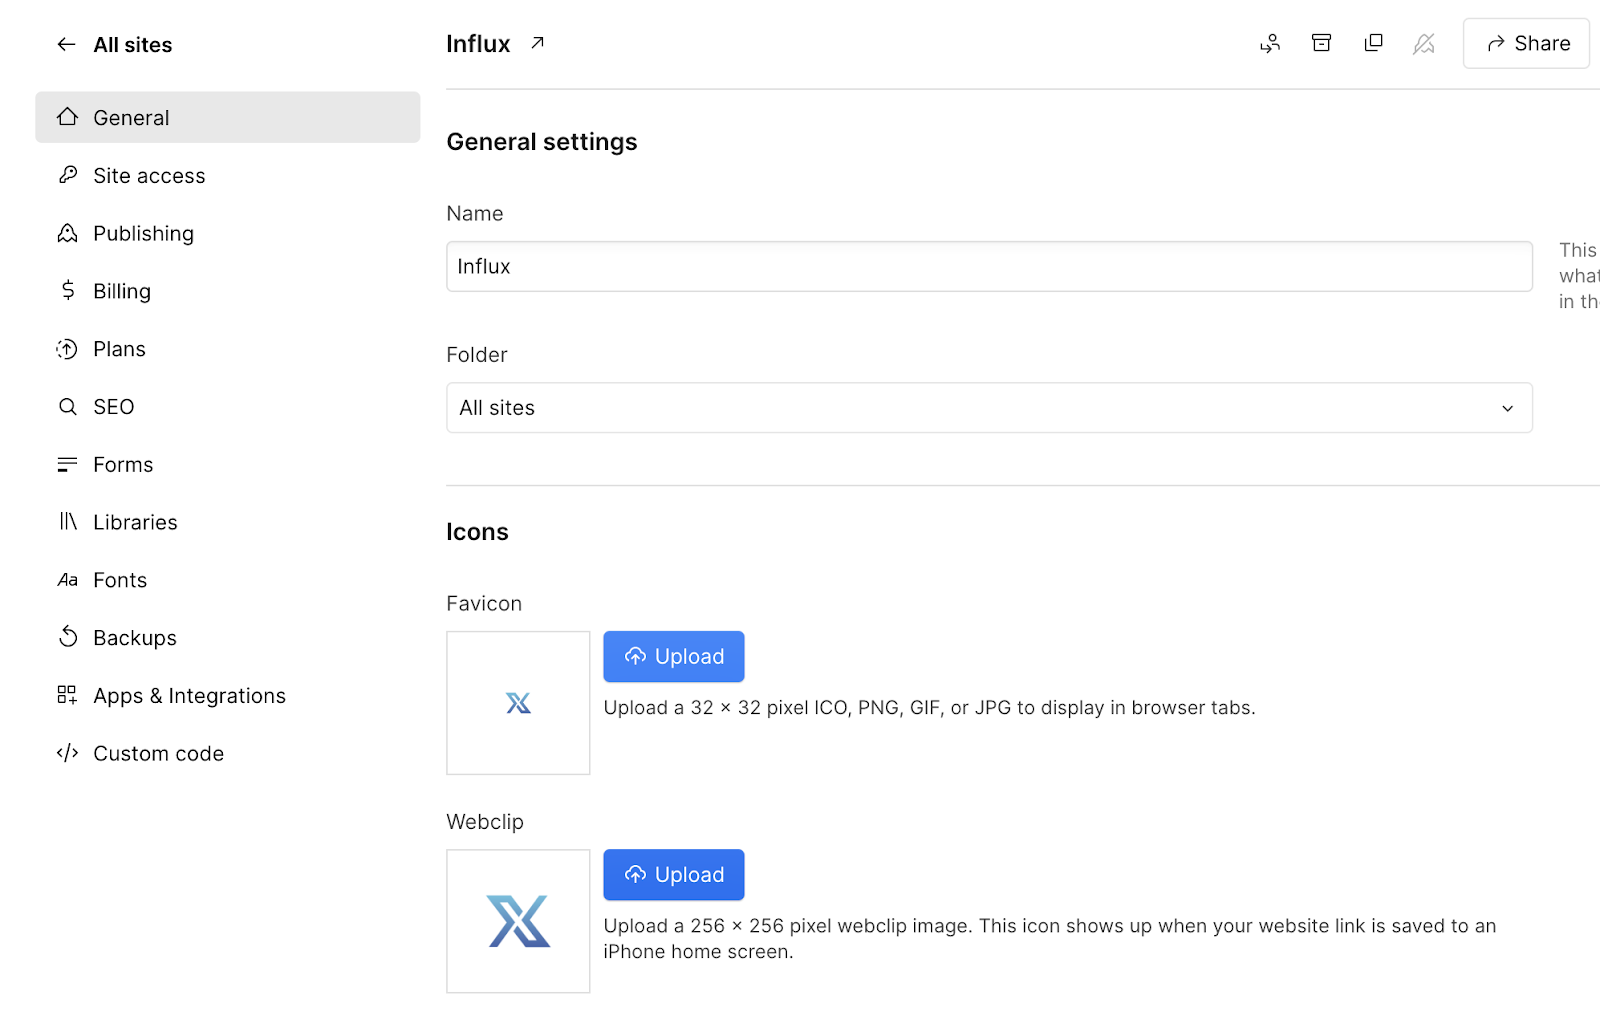
Create or transfer over your favicon
A favicon is a small, iconic image that represents your website. It's typically displayed in the address bar of a browser accessing the site or next to the site name in a user's list of bookmarks. If you're starting from scratch, design a simple yet distinctive icon that represents your brand. It should be square and at least 16x16 pixels. There are many free online tools like Favicon.io or Favicon-generator.org that can help you create this icon.
To transfer your favicon onto your new site follow these steps:
- Transfer an Existing Favicon: If you're moving an existing favicon over to a new site, locate the .ico file in your old website's root directory. Copy this file.
- Upload to New Website: Now, go to your new website's root directory and paste the .ico file there.
- Implement Favicon: Lastly, you'll need to add a line of code to the head section of your HTML. It should look something like this: <link rel="icon" href="http://www.yoursite.com/favicon.ico" type="image/x-icon">. Replace http://www.yoursite.com/favicon.ico with the actual path to your favicon file.
- Test: Make sure to test your favicon by opening your website in various browsers to ensure it displays correctly.
During launch
Putting Your New Website Live
Updating Domain DNS and Hosting
Depending on where your website is being hosted, either you, your web designer, or your IT company will be in control of your domain name and will likely need to update your domain name’s DNS setting to point to the new website and server.
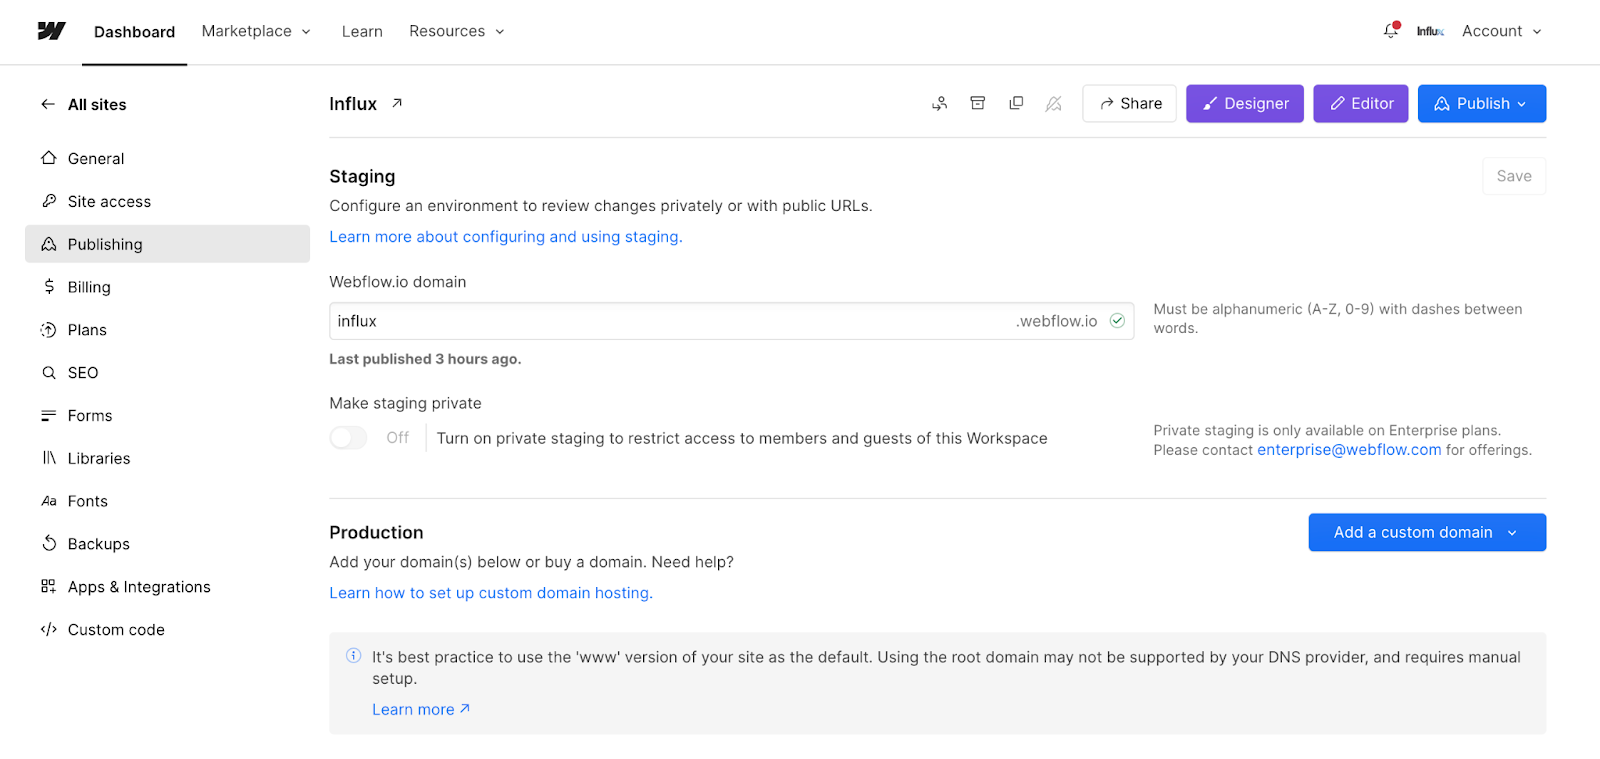
In Webflow this is easy and can either be done manually or directly in the project by logging in via your domain registrar.
To find and connect your custom domain via Webflow:
- Go to Site settings > Publishing tab > Production
- Click Add a custom domain
- Choose the Quick Connect domain
- Click Continue
- Enter the domain you want to connect with Webflow (e.g., yourdomain.com)
- Click Continue
- Search for and choose your DNS provider (i.e., the provider from which you purchased your domain)
- Follow the steps to sign in with your DNS provider and authorise the connection to Entri
- Click the Close window to complete the connection and return to Site settings
- Click Done
When transferring your domain from a different hosting provider to Webflow, you should verify if you want to change or update your DNS records.
Test again
Your website is live, now it’s time to test it all over again! Here are some areas we recommend checking:
User Experience
Double-check the user experience to confirm it aligns with pre-launch expectations, ensuring no implementation issues affect it. Here are some things to check for after going live:
- Cross-Browser Design Consistency: Verify that your website's design appears as intended across different web browsers.
- Cross-Device Design Consistency: Confirm that your website's design is rendering correctly on various devices (smartphones, tablets, laptops).
- HTML/CSS Validation: Ensure that your website's HTML and CSS code is fully validated and error-free.
- CSS Styling Accuracy: Check that all CSS styling appears as planned across your website.
- Favicon Display: Make sure the favicon is correctly implemented and visible on browser tabs.
- Internal Link Functionality: Test all internal links to ensure they are functioning correctly and leading to the intended pages.
- External Link Functionality: Verify that all external links are operational, opening new tabs as expected.
- Social Media Integration: Test social media share icons for functionality, ensuring they link correctly to respective social platforms.
- Feed Functionality: Confirm that all feeds (RSS, news, social media) are active and updated as intended.
- Company Logo Navigation: Ensure the company logo is linked and redirects to the homepage when clicked.
Links
Similar to prelaunch, you should test all of the links on your website to ensure there are no broken links or 404 not found errors. You can use the Screaming Frog SEO Spider tool for this. Thankfully, you can use the free version to crawl up to 500 URLs.
Contact forms
The majority of business websites feature contact forms, as they are an essential way to collect information about potential customers or clients.
When you put your site live, check the contact forms as if you are a potential customer. Next check email notifications are working if relevant and the text formatting within the form is correct.
Tracking
Traffic - Google Analytics 4
By setting up GA4, you can better understand where the visitors of your new website are coming from. Collecting data, even if you don't intend to use it immediately, will enable you to conduct better analysis in the future, by doing so you can make more informed marketing decisions.
To connect Google Analytics to your website you should:
- Access your Google Analytics 4 property.
- Click on the "Admin" tab.
- In the Property column, select "Data Streams" and choose your desired data stream.
- Navigate to the "Tagging Instructions" section where you will find two options to connect GA4 with your website.
The first way to do so is the Global Site Tag method. Simply copy the code and paste it into the <head> section of your website.
The second method is using Google Tag Manager. To do this you can follow the steps mentioned below:
- Log in to your Google Tag Manager account and navigate to the Tag section.
- Click on the "New" button to create a new tag.
- In the Tag Configuration section, select "Google Analytics: GA4 Configuration".
- Enter the measurement ID (Step 4) for your GA4 property.
- Click on the "Triggering" option and choose "All Pages" to track all pages on your website.
- Finally, click the "Save" button to save this tag.
Your GA4 is now connected to your website.
Conversion tracking
To understand how well your website is performing you should set up conversion tracking. Conversion rates are determined by dividing the number of visitors who achieved your desired outcome upon visiting your landing page by the total number of visits.
The best-performing landing pages with high conversion rates understand the importance of valuing visitors' time. After addressing the challenges faced by your users and defining their issues, the next step is to propose a solution. These should be presented in a manner that resonates with your target audience. If you have implemented Google Tag Manager as explained in the steps above then you should set up conversion tracking for your website. This is a whole guide on its own, and to set up conversions via Google Tag Manager you should visit the support centre for detailed, step by step instructions.
Heatmaps/User Behaviour - Microsoft Clarity
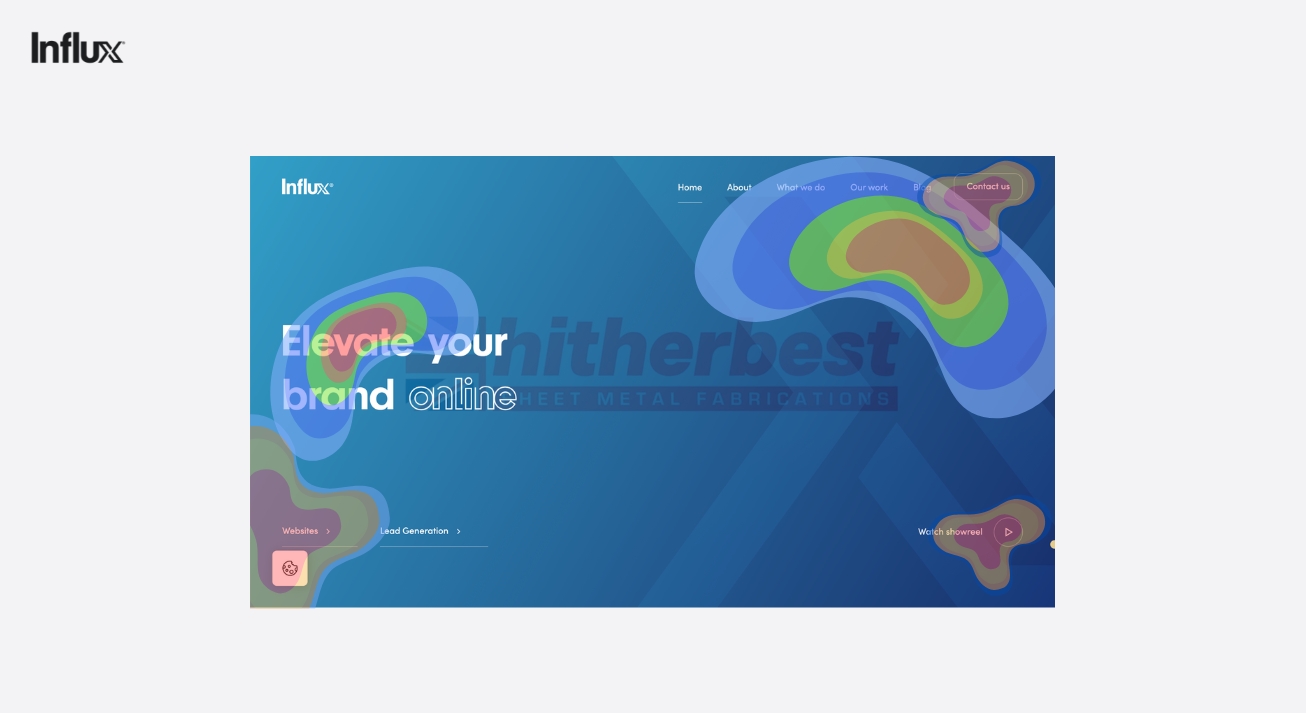
Heatmaps can provide invaluable information about your website's usability and performance. For instance, if you notice that users are clicking on non-clickable elements, this could indicate a UX design issue that needs to be addressed. Similarly, if important CTAs or content are not receiving engagement, they may need to be repositioned or redesigned.
Using heatmaps, marketers and web designers can optimise the layout, design, and content placement on their websites, thereby improving user experience and potentially increasing conversions. It's a powerful tool for website optimisation, providing a visual way to understand user behaviour, and can lead to actionable insights to improve your website's overall performance.
Remarketing/Pixels (Meta, LinkedIn etc)
Remarketing, facilitated by pixels from platforms like Meta (formerly Facebook) and LinkedIn, allows you to track visitors to your website and later target them with specific ads. This is beneficial as it increases the chances of conversions by targeting people who have already shown interest in your products or services.
- Go to your chosen platform's ad manager and create a new pixel.
- After creation, copy the unique pixel code given.
- Paste this code into the header section of your website's code.
- Check if it's in the settings or SEO section if you're using website builders like WordPress or Squarespace.
- Ensure the pixel code is on every page you wish to track.
- Verify the pixel is active by checking back in your ad manager.
- Start creating remarketing campaigns targeted at your website visitors.
Technical SEO
Check site speed again
During the launch of your new website, you should check your site speed again. Should your page speed fall short of the optimal green zone, consider exploring page optimisation tools such as WP Rocket or NitroPack.
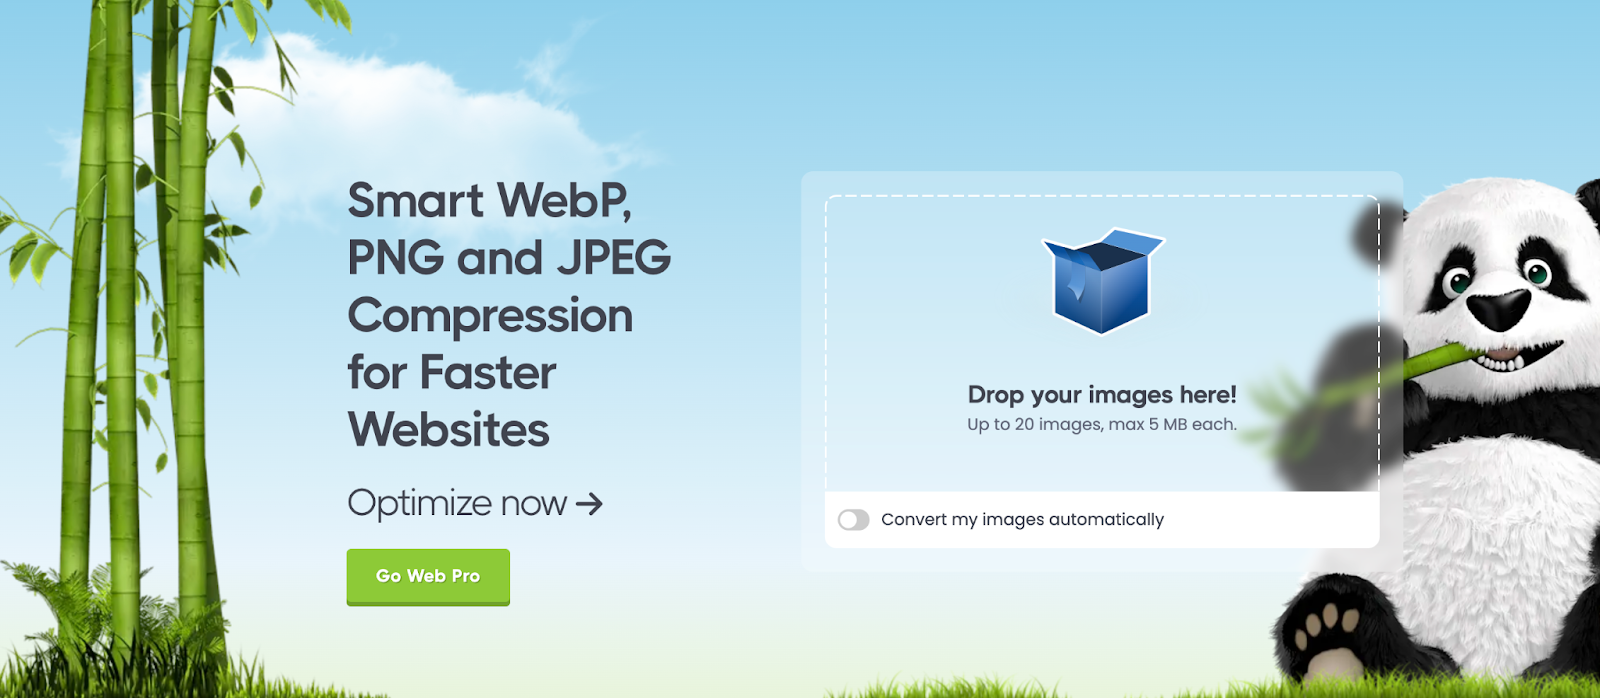
Another way to increase your site speed is by optimising your images. Reducing their size without compromising on quality can also contribute significantly towards enhancing your site speed. A fast-loading website not only improves user experience but also boosts your SEO ranking. To do this we recommend using TinyPNG.
Google Search Console & Bing Webmaster Tools
Submit sitemap
Google Search Console provides a wealth of tools and reports to help you measure your site’s Search traffic and performance, fix issues, and make your site achieve the best possible results in Google Searches. Advanced analytics allow you to see which queries bring users to your site and analyse your site’s impressions, clicks, and position on Google Search. The platform can help you to get your site properly listed on Google, as well as help you to optimise content.
It also allows you to look after other key aspects such as:
- Getting alerted on issues and potential fixes for your website
- Understanding how Google Search sees your pages
- Testing and improving your site’s mobile usability
A quick glance at the screenshot of the new Google Search Console (above) quickly shows how many tools you have at your disposal in this powerful platform. It is worth noting, however, that this can be extremely daunting for those without a pretty good technical knowledge and it may be beneficial to work with an SEO expert to make the most of what it has to offer your business.
If you have used the search console in the past, you may notice that the entire interface has been updated as part of an ongoing “Graduation” by Google, the aim of which has been to streamline and simplify the tool to maximise its usability and value to end-users. Find out more about what changes may affect you as a historical user here at the official Google blog.
Submit for indexing (last)
There was a time when once you put a website live, you simply had to wait for the Google Bots to do their thing and hope that your website was indexed and listed fairly quickly. Luckily for business owners, those days are long gone and it is now far easier to submit and manage your listings. Using the Google Search Console, it is possible to manually request that new URLs be crawled by Google. In order to make sure your site is indexed correctly and that you are able to take advantage of the full benefits of Google Search Console as described in the previous section, it is important to properly set up your console.
This is important for both brand-new projects and redesigns of existing websites. You should also do this whether you have built a whole, brand-new website or simply updated an existing page.
Imagine that you have added a new offering to your company’s services page and wish to attract customers for this new service. If you simply wait until the next time the page is crawled by Google, you may not appear in search results that relate to that service as Google will not realise your page has changed. The submit to Google tool allows you to solve this problem and start generating sales as quickly as possible.
The Submit URL tool allows you to:
- See the current index status of a URL
- Retrieve information about Google’s indexed version of your page. See why Google could or couldn’t index your page.
- Inspect a live URL: Test whether a page on your site can be indexed.
- Request indexing for a URL: You can request that a URL be crawled (or recrawled) by Google.
- View a rendered version of the page: See a screenshot of how Googlebot sees the page.
- View loaded resources list, JavaScript output, and other information: See a list of resources, page code, and more information by clicking the more information link on the page verdict card.
However, submitting your URLs does not guarantee that your page will rank in SERPs – how well your page performs will ultimately come down to SEO. If you are confident that you have implemented best practices in SEO for your site, then it is recommended that you make good use of these tools. Again, you may find it beneficial to get expert support.
What to do post-launch
SEO
Google My Business
Did you know that as many as a third of Google searches are for local businesses? Or that 50% of all the mobile consumers who search for a local business in a day visit it as well, with 18% of them going on to make a purchase? With this in mind, it would be crazy not to take advantage of what Google My Business has to offer.
With a Google My Business Account, you get more than a business listing. You get to create a Business Profile that lets you easily connect with customers across Google Search and Maps. You will also increase your search visibility in search engine result pages (or SERPs).
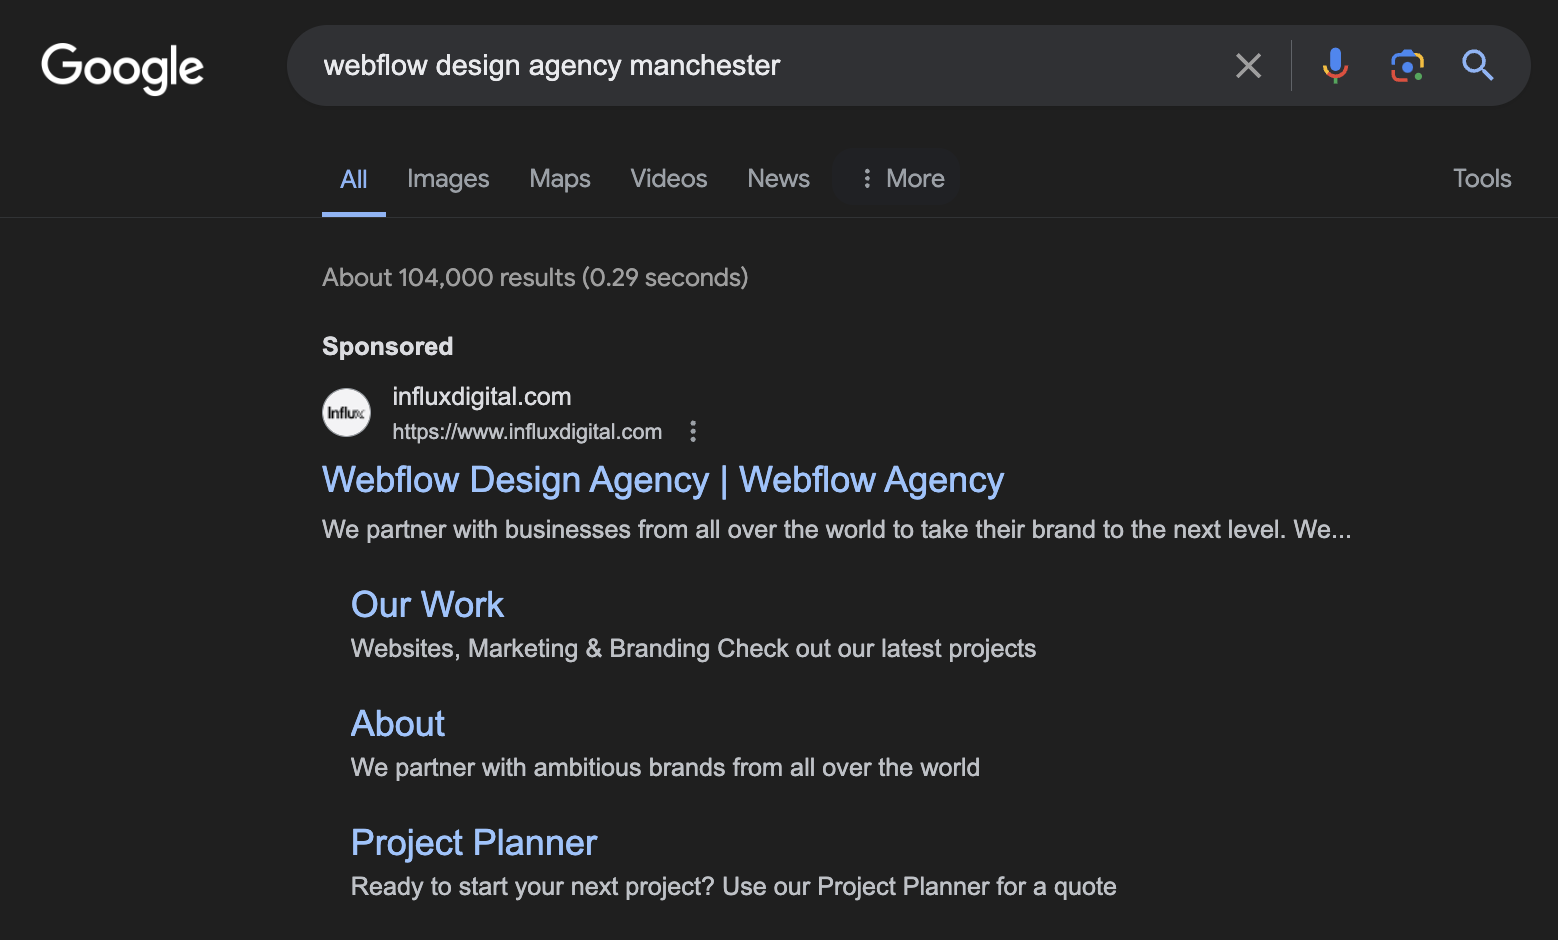
Most Google results pages now contain up to 3 local business listings and their information. These are populated with Google My Business listings. Take a look at the example below for what comes up if you search ‘Influx Digital’. A complete and optimised listing can help your business land in this section, significantly enhancing your search performance. All it takes is one click for searchers to get to the rest of your content or take actions such as “call” or get directions.
It even works for non-branded keywords too, here is an example of “sheet metal fabrications Telford”. Here you will see one of Influx’s website and digital marketing clients Hitherbest taking full advantage of the Google Maps Local 3 pack with their Google My Business listing.

Best of all? Setting up a Google My Business profile is completely free.
By doing so, customers will be able to leave you reviews through Google which provides tangible evidence that your business is trustworthy and reliable.
Link Building (off-site)
Once your website is live you want to get more traffic which can be done through backlinking. You'll need to improve your website's search engine rankings and the number of keywords your site appears for.
Backlinks are crucial for improving your site's Google rankings and online discoverability. High-quality backlinks can boost your search engine rankings, while also helping your business get discovered by driving relevant traffic from authoritative sites that link to you. This can increase your exposure to audiences interested in your content or topics.
Create a content plan
Creating an SEO content plan after launching a new website helps increase your site's visibility and ranking on search engines and ensures that your website's content is relevant and valuable to your target audience.
We recommend performing keyword research and competitor research to find what content your competitors are putting out there, what performs well and what they are ranking for. By doing this you are able to create a content strategy that will increase your new site’s visibility. If there are keywords that are relevant to your audience and industry, you should create a piece of high-quality, useful content that mentions these keywords. This not only improves your SEO but also establishes your brand as a reliable source of information in your industry.
Create new content
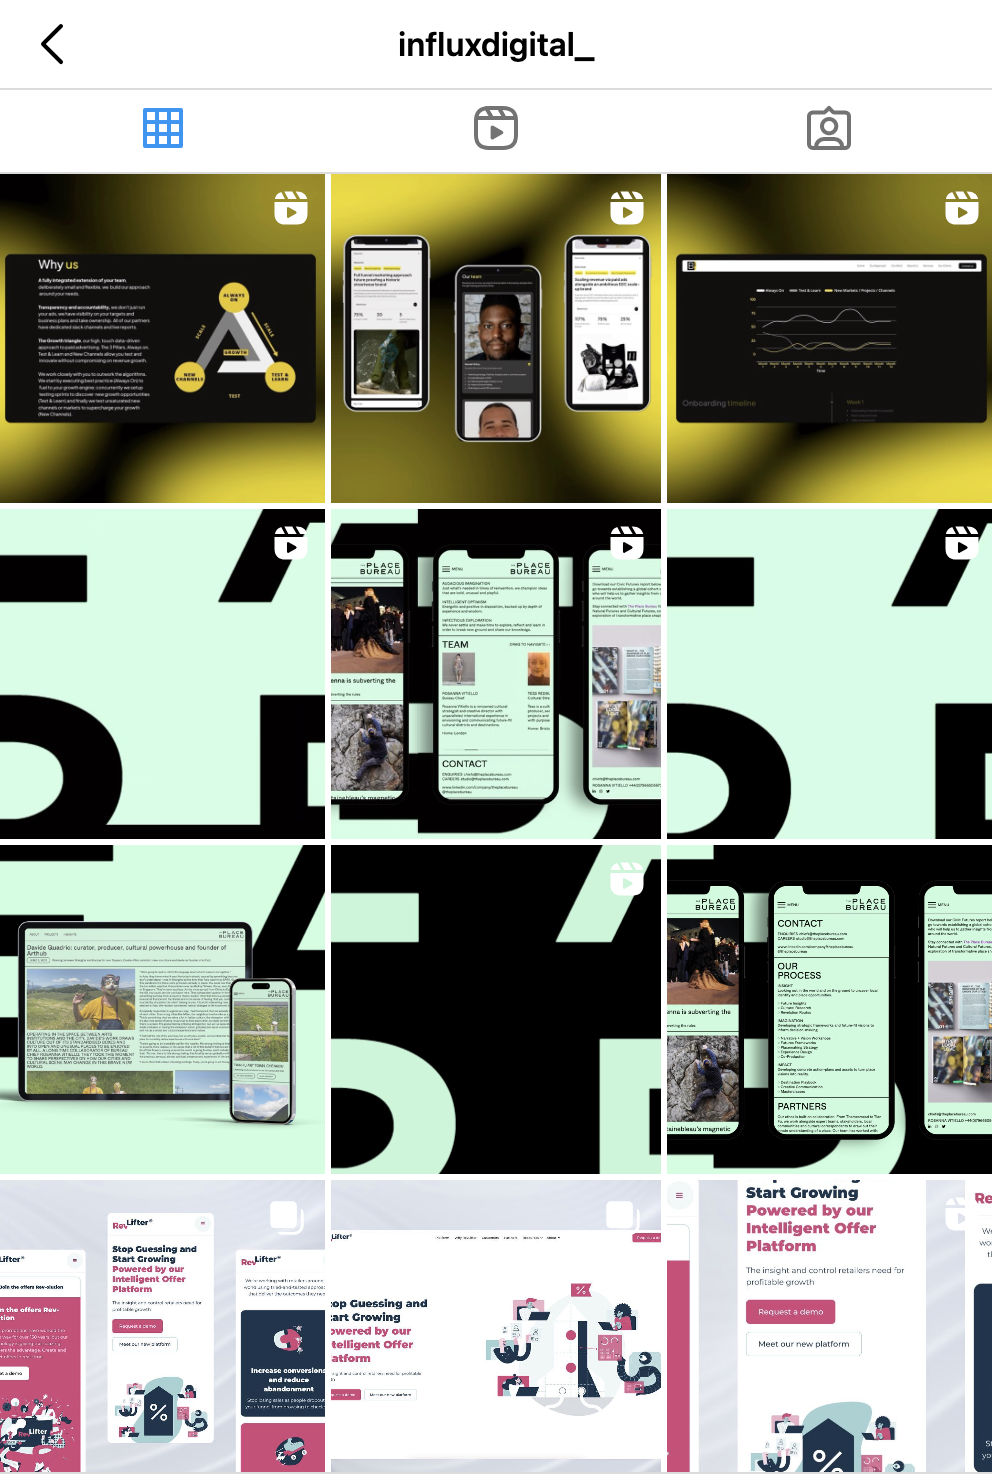
When launching your new website, you should create fresh and engaging content for both your website and social media platforms. By regularly generating new content, you demonstrate your commitment to providing value and relevant information to your visitors.
Fresh content helps improve your website's search engine optimisation (SEO), making it more likely to appear higher in search results and increase organic traffic. Additionally, sharing new content on social media platforms allows you to drive traffic to your new website.
You could create new content in the form of useful blogs (like this one!), landing pages such as service pages, or social media posts.
Google Ads
Now your website is live you can resume your Google ads, or if you’re completely new set them up.
To resume your Google ads, follow these simple steps:
- Log into your Google Ads account.
- Click on the Campaigns icon.
- From the section menu, select the Campaigns drop-down.
- Click on Ads.
- Mark the boxes next to the ads you wish to pause or resume.
- Click on Edit at the top of the table.
- From the drop-down menu, choose Pause to stop your ad, or Enable to restart it.
To set up Google ads from scratch we have included some very simple instructions, however, you may wish to follow a step-by-step YouTube guide for a more detailed demonstration you can follow along. Additionally, you may wish to work with an agency to achieve the best results when it comes to your digital marketing campaigns.
- Open the Google Ads website and sign in.
- Click on "Start now" to create a new campaign.
- Choose your campaign type and goals.
- Set your geographic location and language.
- Define your daily budget.
- Choose your keywords.
- Create your ad by adding headlines and descriptions.
- Enter your website's URL.
- Click "Save and continue" to launch your ad campaign.
CRO
Optimise landing pages
We recommend the following tools for optimising your landing pages…
Google Analytics
When it comes to success, measurables are everything – and your new website is no exception. The more data you can collect about who is using your website and how the more power you have to improve your website’s performance. As a very quick overview, Google Analytics allows you to conduct tasks that include the following:
- Analyse how visitors find your website and where they come from.
- Track what visitors do when they’re on your website (which pages they visit, how long they spend on different pages, and what actions they perform).
- Identify which pages are performing well and which are not (are visitors leaving as soon as they get to the page or ‘bouncing’?).
- Track conversions (for example, contact form submissions, product sales or calls).
Clarity
Microsoft Clarity is an entirely free tool that provides valuable insights into how users interact with your website, helping you understand their behaviour and preferences better. It’s great for websites of all sizes as it allows you to track an unlimited amount of user sessions and is a no-brainer when creating your new website.
It's easy to install and operate and will allow you to easily track features such as bounce rates and click-through rates. You are able to gain insights into how users are interacting with their site and provide user insights through tools such as heatmaps and session recordings.
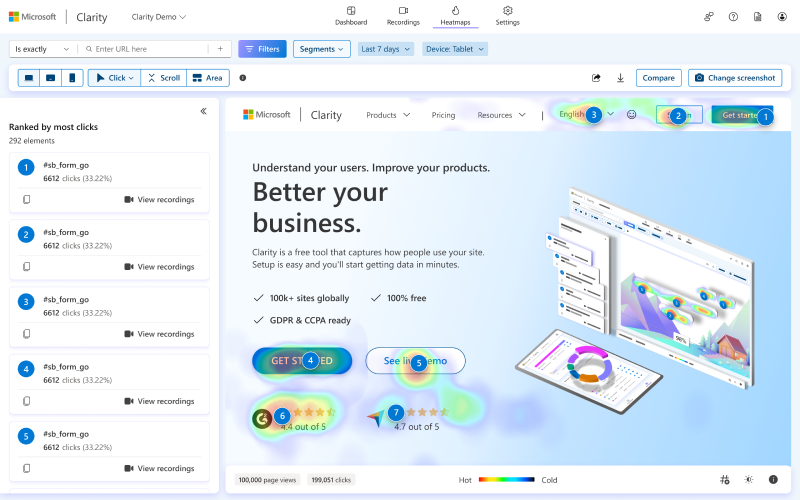
(Image credit Microsoft Clarity)
Unbounce
Another tool we recommend to install when you launch your website is Unbounce. We use Unbounce for CRO, landing page creation and A/B split testing. Each customer's journey to conversion is different and by studying their pathways on your website using a tool like Unbounce, you can uncover the steps they're missing and amend your content on your website.
Other
Ongoing maintenance and security updates
When launching a website, maintenance and security updates are a continuous process to allow improvements to your website’s functionality, security, performance and user experience. We advise you to make regular updates and tests to ensure your website is up-to-date and running efficiently. You can use the tools mentioned in the guide previously to run regular tests across your website, especially when adding new pages. You may also consider adding a firewall to your website for further security and protection against attacks.
If you’ve got to the end of this checklist then well done, you’ve been on quite the journey! We wish you the best of luck with your new website.
If you want to speak to a web design and digital marketing company in Manchester about how we can help you with your website, contact us today.
.svg)

